|
|
©1999-2003. All rights reserved. |
Sandbags
Materials
TIPStick the Fimo to the side of a hot mug of tea to soften it up a bit before kneading.
Modelling
Make baseFirst cut the base out of thin card. This should be about 8mm across and 50mm or so long.
Glue on first row
Cut grooves Now take another sausage of Fimo and lay it on top. This should be slightly longer than the one underneath. Cut the ends of the top sausage off to the right length, taking care not to damage the Fimo on the layer below. (If you use a sausage of Fimo that is the right length, the ends will be lumpy and misshapen). Now cut grooves as before, before going on to the next layer. Repeat until the sandbags are complete. Then bake the Fimo in the oven or cook it under a desklamp.
Add more layers
Apply texture to base
Painting
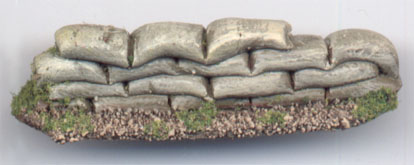
Note that although the colours in the photo appear much greyer and less saturated than those in the palette above, this is an effect of the drybrushing technique, and not a result of poor colour matching. | ||||||||||||

©2000. All rights reserved.
| |||||||||||||


