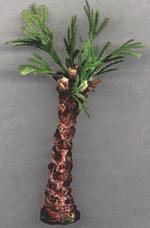
Construction

Cone Preparation
The only thing you will need to do to the cone itself is to flatten
off the bottom. I used a circular sawblade attachment for a modelling
drill, but you could also use a coarse file. Alternatively you could
build the base up around the bottom of the cone with filler. Stick it
to a base cut from mounting board or heavy card with PVA.
Foliage
 You
could use almost any type of foliage, but I've found the ones with small
leaves seem to work best. Cut them up so that there are little sprigs
of 2 or 3 leaves, then put a generous blob from the glue gun on the
end and poke them into a crevice in the cone. The examples at the top
all use type B foliage. One sprig makes two pine cones. Each of the
first two tiers on the sprig was used in one piece at the tip of the
cone. The rest of the foliage was cut into smaller pieces. Note how
the foliage becomes darker and more widely spaced further down the trunk.
In this example I have used one with more fronded leaves, which demonstrates
how the same technique can be used for a very different looking plant.
Painting

 Luckily
almost no painting at all is required. Just give the cone a gentle
drybrush to bring out the texture. I use 'Beige' Sandtex.
