Roof
The roof is supposed to look like a lead roof - the raised strips are the joints where
the lead is folded around a wood batten to stop it leaking. A real roof almost certainly
wouldn't combine this with wavy ridge tiles, but what the hell, you probably wouldn't
have noticed if I hadn't told you.
The roof was fairly difficult to construct neatly. In the end I cut two rectangles
from heavy card and
glued them on to construct a standard pitched roof. Then I cut four triangles and glued
them on to form the other half of the roof. Once the basic structure was in place, I
cut thin strips from the same card to form the joints. The easiest way to to this is
to use a scalpel and metal ruler to cut one strip the whole length of the card. Then
hold it up against the roof to check the length of each of the short lengths, marking
and cutting them one by one.
Ridge Tiles
These are made from strips of card cut with wavy craft scissors. Cut the wavy edge first, then trim off
a strip with a scalpel, as the scissors are hard to control accurately.
Roof Coping
The triangular tops to the walls were built up and decorated with a strip of foam card.
This in turn was covered by slightly wider rectangles of card.
Spires
The tiny spires at each corner are strips of foam card, each one faced with two pieces
of card cut with triangular tops. On top of each is a small square of card with a hole
cut in it for the tip of a cocktail stick.
Parapet
Decorative Trim
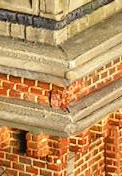
Line of Brick Corbels

About half way up is a line of small brick corbels. These were cut from the narrow
Linka brick column (you need a lot of these). If you look carefully, you can see the
mortar joints are in an alternating pattern.
Window Bars
The inner window with the grid of bars is a standard Linka piece. To 'gothic' it up
a bit, I drew out a # shaped grid on card, and then carefully cut it out with a scalpel and
stuck it inside the frame. The rivets are slices of plastic rod, glued on afterwards (a good
way to pick these up is to prick them with a fresh scalpel blade and pick them up on the
tip).
Skull above Door

The original was made from green putty. I then cast a number using plasticene and plaster
as detailed here. Unfortunately the batch of plasticene was a bit greasy, so they
didn't cast as well as previous efforts.
Door Handles
First I stuck a small rectangle of card to the door, edgeways on, with superglue.
Next I cut a short length of
phone wire,
curled it round a brush handle into a C shape, and then stuck it to the door.
Stone Overhangs

Three of the horizontal bands (formed from foamboard), have been decorated with
strips of
spaghetti stuck up the middle of them.