Construction

Cut base to shape
 Cut
the surround before the centre with a sharp scalpel. Make sure you don't
cut the initial hole too big because it will tend to grow as you chamfer
the edge.
Cut pool surface
Cut a piece of plastic card slightly larger than the hole, and glue
it to the underside of the surround with epoxy resin or superglue. Plastic
card is used because it does not warp and will stay flatter than card
or mounting board.
Texture surround with sand
This was applied as Stage 3.1
of the arid basing method.
Add pebbles
A scenic scatter material called talus (the geological name for
rock debris) which came from Woodland Scenics was used for the edge
of the pool. This was stuck down with PVA. Note the particles nearest
the pool are darker as they are coated with acrylic medium, which made
them appear wet. They were also not drybrushed.
Painting

Paint Edge
The edge was painted as Stage
3 of the arid basing method.
Blue Fade
 Two
colours were used for the pool water. One was a turquoise acrylic,
and the other was the ubiquituous Beige Sandtex masonry paint. These
were mixed together, along with a little retarder
to give the effect. Whatever type of water you are painting, it will
usually look more realistic if you make it paler and browner towards
the edges.
Gloss surface to water
 The
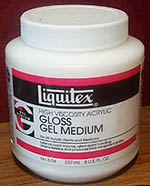
final stage was to cover the surface of the pond in gloss
acrylic medium. This has a very thick texture, so it is very difficult
to make it flat. If it is diluted sufficiently to make it runny, it
is almost all water. Instead I put on a layer a few mm thick and then
smoothed it off by making small circles with the end of my finger.
This results in small large ripples rather than the choppy stippled
effect that I was getting smoothing it in any other way. This surface
texture, however, could be a definite advantage when making a river
where the water would look more natural if rippled.
One alternative material would be high gloss varnish, athough to
get a thick enough layer would require a lot of coats. Another would
be clear epoxy resin, but this is unpleasant stuff to handle.
