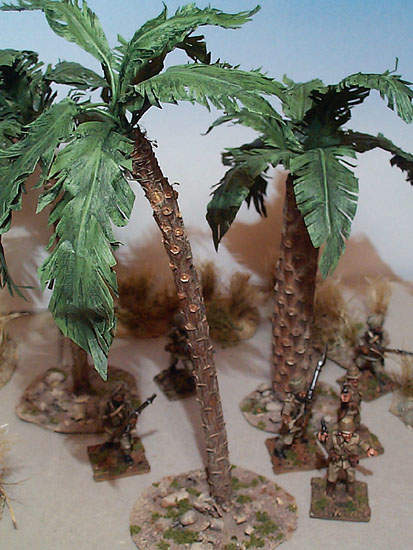
This method is the best way of making palm trees I have found (and
I've tried quite a few). These are relatively quick to make, very tough,
very cheap and look more like real palm trees than anything else I've
seen.

1) Leaf 'Blanks'

Wrap tape over wire
 Take
a piece of wire about 3" (8cm) long. Stick the wire onto the end of the
masking tape, leaving just over an inch of naked wire. Next fold the
masking tape back on itself, leaving about half an inch of masking tape
at the end of the leaf with no wire in it. This is the standard size
of leaf, but it is good to make some more which are slightly larger
or smaller. However, keep the exposed wire stalk the same length on
each.
2) Shaping the Leaves

 Cut
overall shape
Start at the stem end of the leaf and cut towards the tip with a scalpel.
The leaf should widen to the full width of the masking tape before
tapering off again.
Feather leaves
The next stage is to feather your leaves into fronds by making
hundreds of small cuts in them.
Making the head
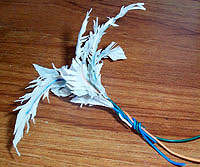
Once you have between 7 and 9 leaves you can make them into the 'head'
of the palm tree. Bunch them together, and don't worry about the shape.
The only thing to remember is that the smaller leaves should have
slightly longer stalks, as they will be at the centre of the clump.
Dab some epoxy resin on and then wrap a piece of masking tape tightly
around the wire. When the glue has set, slice the wire and tape off,
so that only a tiny ring of tape remains (about 3mm or 1/8th of an
inch).
3) Trunk

 Trunk
Trunk
A quick and effective trunk can be made using a twig from a pine tree.
Cut it off flat underneath then twist the pointed tip of a scalpel
round and round to make a hole to stick the leaves into.
Sticking to base
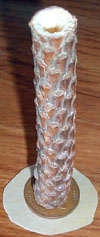
Trees need to be stuck down at this stage. Cut a small piece of
mounting board or heavy card and glue a coin or washer to it with
epoxy resin. This weights it and makes it harder for your tree to
be knocked over. When this has set, glue the trunk to the top of this,
also with epoxy resin.
Gluing head to trunk
Glue the palm head into this hole with lots of epoxy resin. (I really
can't imagine any other glue being right for this job, so I don't
recommend using super glue or PVA as you are unlikely to get a strong
enough bond). Once the glue has set, you can arrange the leaves in
a realistic way - the wire allows them to be easily positioned.
4) Base Texture and Painting

Texture and paint the base - for the trees above, I have
used the arid basing method described
here.


 Take
a piece of wire about 3" (8cm) long. Stick the wire onto the end of the
masking tape, leaving just over an inch of naked wire. Next fold the
masking tape back on itself, leaving about half an inch of masking tape
at the end of the leaf with no wire in it. This is the standard size
of leaf, but it is good to make some more which are slightly larger
or smaller. However, keep the exposed wire stalk the same length on
each.
 Cut
overall shape
 Trunk
Trunk