|
|
©1999-2003. All rights reserved. |
Painting Example
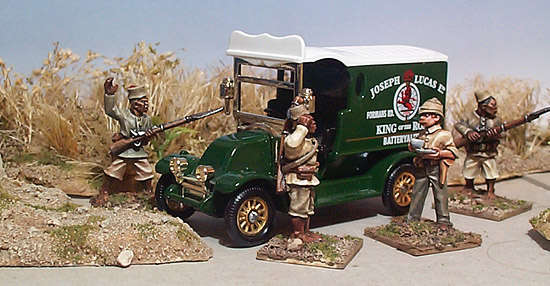
28mm WWI Van
This is a die-case model which has been repainted as a WWI British
army vehicle deployed in Africa. The painting method can be used for
most large vehicles.
Preparation
| |||
 |
Painting

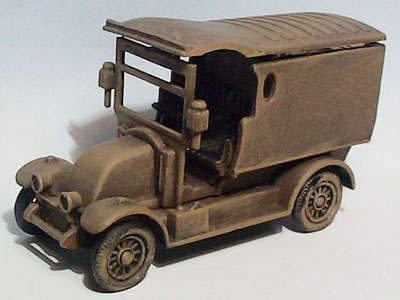
Basecoat
![]() The
vehicle was first given an all-over coat of Humbrol Dark Earth Acrylic.
The
vehicle was first given an all-over coat of Humbrol Dark Earth Acrylic.
Inkwash
![]() To
add depth to the shadows, and to make it look a bit dirty, it was given
a wash of dark brown.
To
add depth to the shadows, and to make it look a bit dirty, it was given
a wash of dark brown.
Drybrush 1
The base colour was then drybrushed on heavily. If the highlight drybrush
was applied straight over the wash then the overall colour would be
a bit grey (or de-saturated).
Drybrush 2
![]() The
basic colour was then mixed approximately 50/50 with Sandtex Beige.
This was
The
basic colour was then mixed approximately 50/50 with Sandtex Beige.
This was
 Van following Drybrush 2 |
Tyres
![]() Prior
to the final drybrush, the tyres were painted black.
Prior
to the final drybrush, the tyres were painted black.
Drybrush 3
![]() A
final highlight was added with a gentle, very dry drybrush of pure Sandtex
Beige. This included the tyres.
A
final highlight was added with a gentle, very dry drybrush of pure Sandtex
Beige. This included the tyres.
Lights
After the drybrushing the lights were painted black and then silver
(leaving a small amount of black around the edge).
Painting Rust

![]() Mix
up a dark orangey brown. The same colour will be applied in two different
ways.
Mix
up a dark orangey brown. The same colour will be applied in two different
ways.
Stain
The first method simulates a rust stain, where the paintwork is
beginning to discolour due to adjacent rust, and the second simulates
areas where the paint has flaked off altogether exposing bare rusty
metal. Slightly dilute the paint, dab on a patch, then before it can
dry, rub off most of the paint. This will create a delicate smear, covering
an area 4 or 5mm in diameter.
Bare Rust
Once you have applied patches of stain to all the rusty areas, use
the same colour paint, but load the brush more thickly, and dab on some
smaller areas in the middle of the stains. If you use an old brush,
it will tend to separate into a number of clumps which will make it
easier to get the shape. These much darker patches within the stain
will resemble bare rusty metal.


