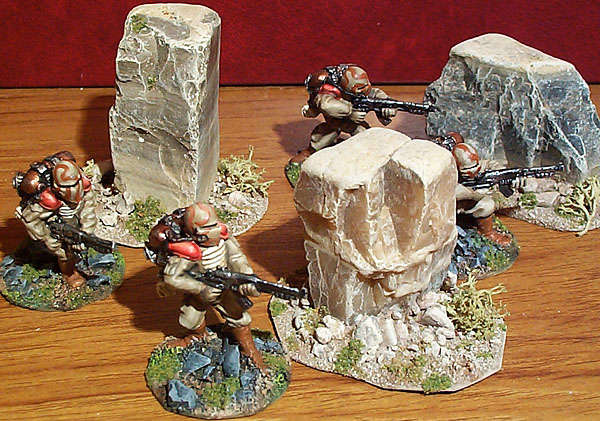
There's nothing so reassuring as a big piece of rock to get in the way of the bullets, although ricochets can be a problem.
The hardest part about making these is finding the stones. Apart from that these are remarkably quick bits of scenery to make and the stone gives the pieces a satisfying weight. These particular ones came from a Greek beach, but beaches and rivers are not generally too good - the stones tend to be heavily rounded by tumbling in the water.This looks unrealistic for large rocks which in reality are usually much craggier. The figures hiding behind the rocks are from Alternative Armies, but I'm afraid I don't know what the range is called. |
Materials
|
|
Construction
|
Base material Gap filling Small Rocks |
Painting
|
The best thing to do is to paint them as little as possible in order to let their natural colours show through. Optional Wash Drybrush
|
Desert/Arid Basing
|
These rocks are based using my standard method for arid scenery. 1) Sand Texture. The first stage was a coat of PVA which was sprinkled with sand and small stones. 2) Base Coat. Once this is thoroughly dry, it was painted with brown emulsion. You could use acrylic, but emulsion is cheaper, and can be bought in small 'tester' pots. 3) Blotchy Wash. This is then given highly dilute washes of a very dark brown in irregular patches over the surface. (Although with very small areas like these, this stage could easily be skipped. 4) Drybrush. This was then drybrushed with 'Oatmeal' Sandtex masonry paint, although acrylic or emulsion would also be OK. 5) Patches. Small irregular patches of brown were then dabbed on with an old brush. (Again with small areas like these, you could skip this stage too). 6) Flock. Two different colours of flock were then sprinkled over blobs of PVA, which were painted on with an old brush. The flock used was a 'foam' flock rather than chippings. 7) Lichen. Small pieces of lichen in pale colours were attached to the base. |
©2000. All rights reserved.