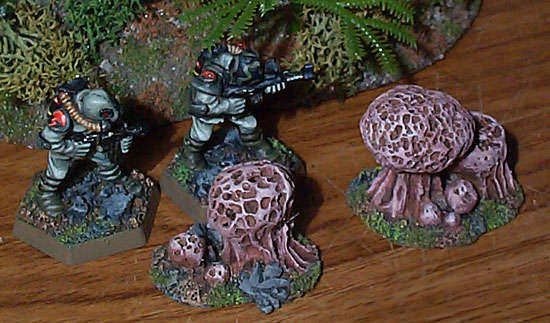
|
Basic Frame
Cut a rounded irregularly shaped piece of card for the base. Make
sure it's big enough - I like to put two or three 'fungi' of different
sizes on a single base. For each stalk cut a small piece of foamcard
about 15mm long and 5mm wide and stick it upright to the base with PVA.
When this has set attach the pumice stone to the top with epoxy resin
or a glue gun.
Stalk
Wrap Milliput around the foam card and shape it so that it forms
a complete sleeve. Spread it up over the bottom of the pumice stone,
so that they form one smooth shape. Also spread it out at the bottom
as it meets the base. Finally shape irregular grooves into the stalk.
For this you could use the head of a pin of the rounded end of a large
needle.
Small Fungi
To make your little clump look more realistic, add some very small
fungi around the base. These are made from milliput. The smallest are
just simple balls but the larger ones have some irregularly sized holes
poked in them (use the pin or needle for this).
Painting
Basecoat with a reddishbrown. I used Humbrol brown  with a bit of Dark Flesh
  .
Use an old brush to work it into the holes in the pumice. When this
has dried then highlight it with at least two drybrushes, made by mixing
ever increasing amounts of white with the base colour. Finally mix some
black with the base colour. Dilute this a bit and wash it into the centre
of the grooves and underneath the head of the fungus. Wipe off any excess
with your fingertip. (See semi-dry
wash and wipe for a more detailed explanation of this process. .
Use an old brush to work it into the holes in the pumice. When this
has dried then highlight it with at least two drybrushes, made by mixing
ever increasing amounts of white with the base colour. Finally mix some
black with the base colour. Dilute this a bit and wash it into the centre
of the grooves and underneath the head of the fungus. Wipe off any excess
with your fingertip. (See semi-dry
wash and wipe for a more detailed explanation of this process.
Texture Base
|
![]()

![]()
![]()
