Tie Fighter

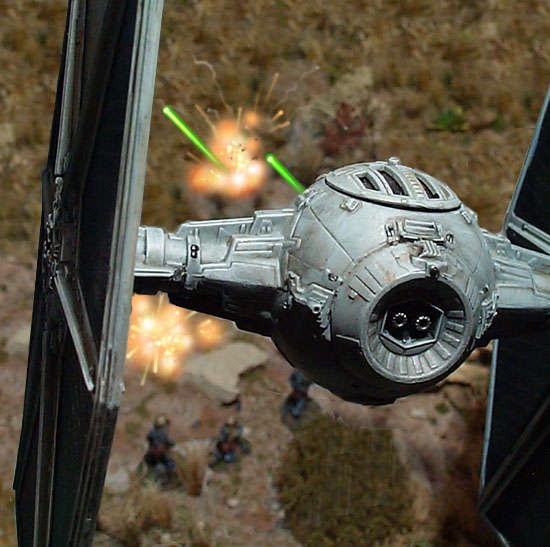
Rebels run for cover as a Tie Fighter sweeps in, guns blazing.

Model & Assembly

Manufacturer
This tie fighter is made by AMT-ERTL. It comes in a box of two with a large and detailed base (meant to be a section of the Death Star or something), which could form an excellent basis for a large piece of scenery.

Pilot and cabin
The pilot and cockpit needed painting before assembling the rest of the model around them. The pilot has a black helmet, gloves and boots, and a grey flightsuit. I painted the helmet with gloss varnish after shading.

Windows
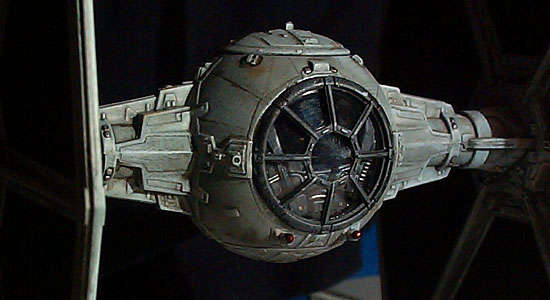
The windows were glued in with epoxy resin, after the surround had been painted. Unlike superglue or polystyrene cement, epoxy will not cause white misting on the clear plastic. The frame to the front glazing is darker than the rest of the tie fighter. It was painted black, then dtybrushed with a dark grey and then a mid grey.

A tip I received from Tony Christney is to rub floor polish into the clear plastic to fill in any scratches.

Bases
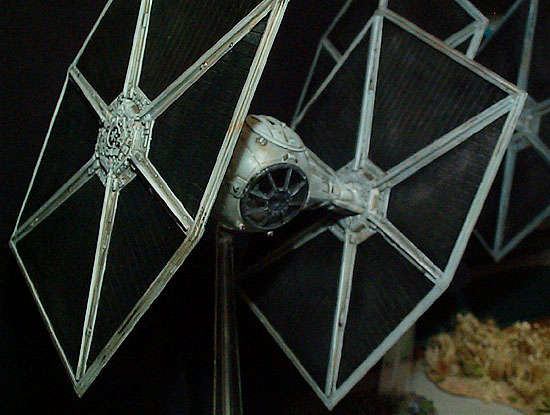
The tie fighters come with clear plastic stands which fit into slots on the machinery base. However I wanted them individually mounted. I cut the bottom of the stands off so that the pole would stick straight up and then glued them to jam jar lids. The joint was strengthened with epoxy putty and then sand, flock, stones etc. was attached to the jam jar lid.

Painting Main Body

When these stages were carried out, the black wing panels were unpainted, so it didn't matter if they got paint on them when neighbouring areas were drybrushed.

Basecoat
 
First the Tie fighters was given a coat of this colour. The front window and top hatch glass were not stuck in until the grey was finished so I could use a big brush to get it done quickly.

Shading Wash
 
Normally a blue-grey would be shaded with a darker blue-grey, however if you want to make something look a bit worn and grungey then try using a brown. This tie fighter was then washed with a dark brown. A wash will tend to gather in the nooks and crannies, and so it provides some shading but it also tends to be a bit uneven and blotchy. With a wash purely for shading, this is a problem, but here the wash is also intended to give a bit of patina, so I made it intentionally blotchy to make the model more realistically tarnished.

Drybrush
 
The tie fighter was then drybrushed again with the base colour. This provided good shading, as the dark wash in the crevices was left untouched. For this first drybrush the brush was still fairly moist and contained plenty of paint so that a reasonably large proportion of the surface was covered.

Light Drybrush
 
To accentuate the shading further, white was added to the base colour and a second drybrush was applied. This time the brush was dryer, so that the paint only came off on the more raised areas.

White Drybrush
 
Finally a very light drybrush of white was applied to really pick out the fine detail.

Rust Drybrush
 
Small patches of this colour were drybrushed on at random points.

Dark Brown 'Oily' Wash and Darklining
 
Unlike the first wash, this was applied with a fine brush and sparingly. Joints between panels were picked out and a dark stain around the base of protruding bits was added. Vertical triangular streaks were also added to imitate weathering etc. The acrylic ink was diluted so these didn't appear too stark.

Painting Wings

Basecoat
 
The panels were given a solid coat of black, taking care not to get any on the fully shaded grey ribs in between them.

Dark Silver Drybrush
 
The wing panels are lightly textured with a grid of fine ridges. In order to accentuate them, I gave them a light and very dry drybrush of silver mixed with black.

Gloss Varnish

Finally to make the wings look more like solar collectors, I gave them a coat of acrylic gloss varnish.

Details

Silver Bits
A few small items were painted black after the grey had been drybrushed and were then picked out in silver.

Guns
The front guns were painted black, then bright silver, and finally they were painted with red transluscent glass paint. (That's paint for painting glass, not made made from glass.


-
©2001. All rights reserved.
-